In the offline world, how do we measure whether our business is generating interest? When we get lot of visitors to our shops or we get phone calls from prospects inquiring about our business.
Tracking website visitors - A challenge
In the online world, website visitors are our currency. Often the success and failure of our online venture depends a lot on how many visitors are visiting our website everyday. It is analogous to how many people are coming to your shop. So, we as website owners, we need to understand and measure how people are visiting our website and the sources of their visits. Knowing the sources of visitors help us understand which aspects of marketing are working and where we need to focus our efforts on. A lot of focus is made on content creation and marketing, but not a lot of efforts are made to track the visitors. This simple guide will help you set up your tracking tools on your website.
Part 1: Installing the tools
1. Install Google Analytics
Most of the website owners would be knowing the use of Google Analytics. However, for the first timers, Google Analytics is a free tool provided by Google to track information related to website visits. 1. Visit www.google.com/analytics and log into your Google Account 2. Click on Access Google Analytics button to top 3. Click on Signup 4. Create a new Website Account as below:
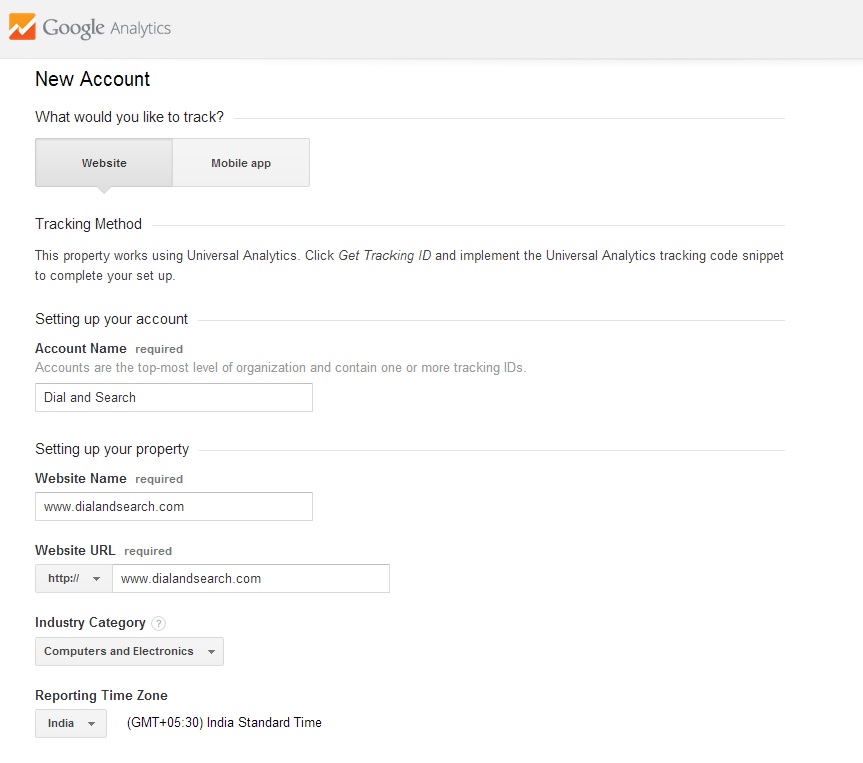
5. The checkboxes are checked by default. Keep them as is. Click on Get Tracking Id 6. You will have to "Accept" to the "Google Analytics Terms of Service Agreement" 7. You will get your tracking code.
![]()
5. Place the code on your website This is the step which will need a bit of HTML expertise. It is a very easy process though. If you have access to your website source code, then you can place this code just before closing the <head> tag. After you have placed code on your website, you can come back to Google Analytics and click on Home tab. You will see the account which you have just set up.

6. Viewing your Google Analytics dashboard
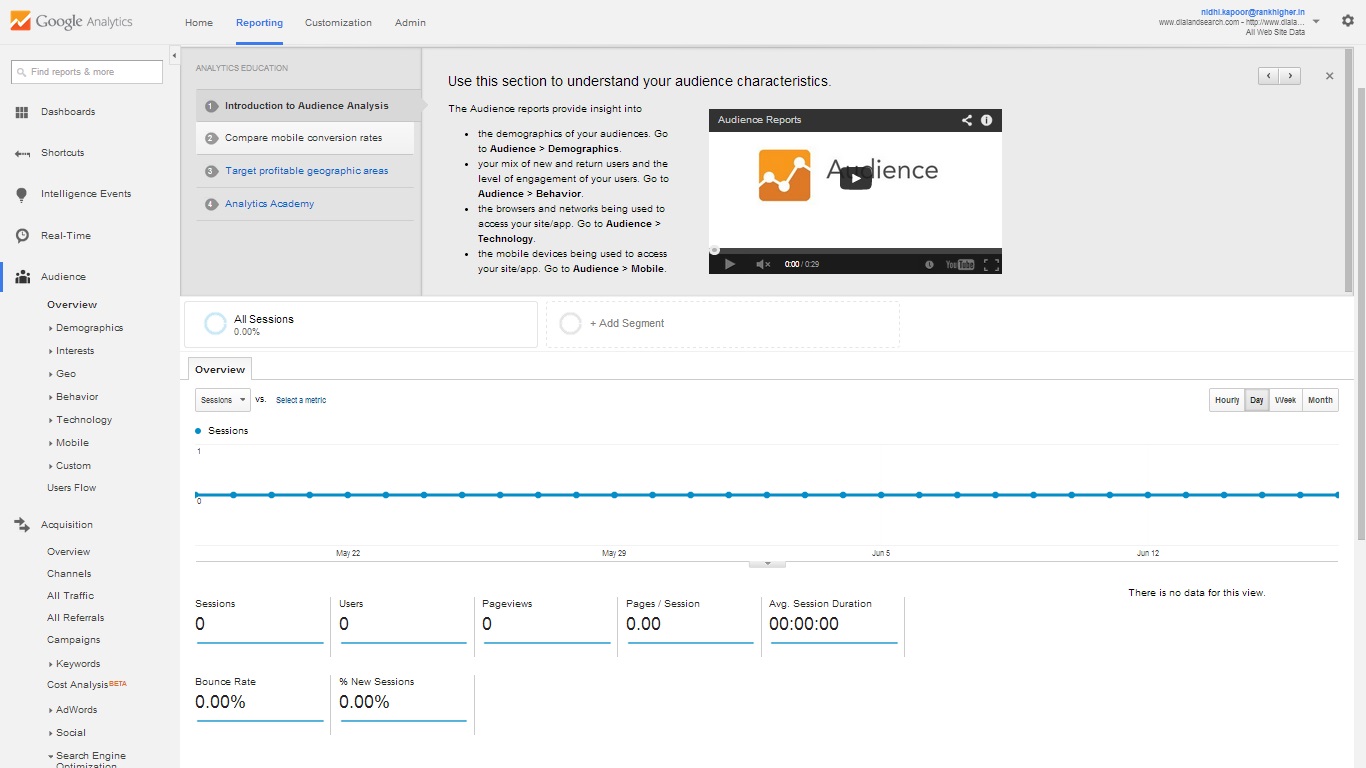
As you can see, the left panel has all the options which you need to check your daily visitor details. If you have completed these 6 steps, then you would have installed Google Analytics Properly. But, hang on, that is not the end of it. There is something more which you need to set up to make sure you are getting all the required data. It is called setting up Webmasters tools. When you click on the "Acquisition" option on the left panel, it will open sub panels. Click on Search Engine optimization --> Queries Queries option, shows us "Queries" which visitors search on Google to come to our website. This is a very good way to find out how visitors are coming to us and what terms they are searching on Google. This data is very useful in shaping our digital marketing strategies. However when you go to Queries now, you would see something like this:
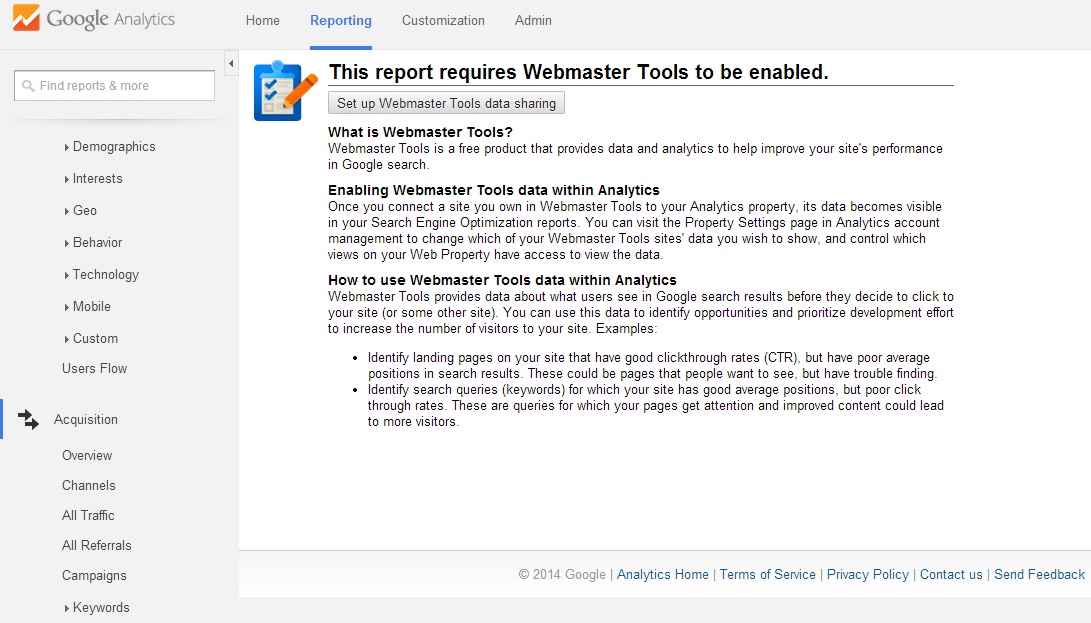
As you can see, your Analytics set up is incomplete. Unless we get details Queries data, it will be difficult to optimise our marketing efforts.
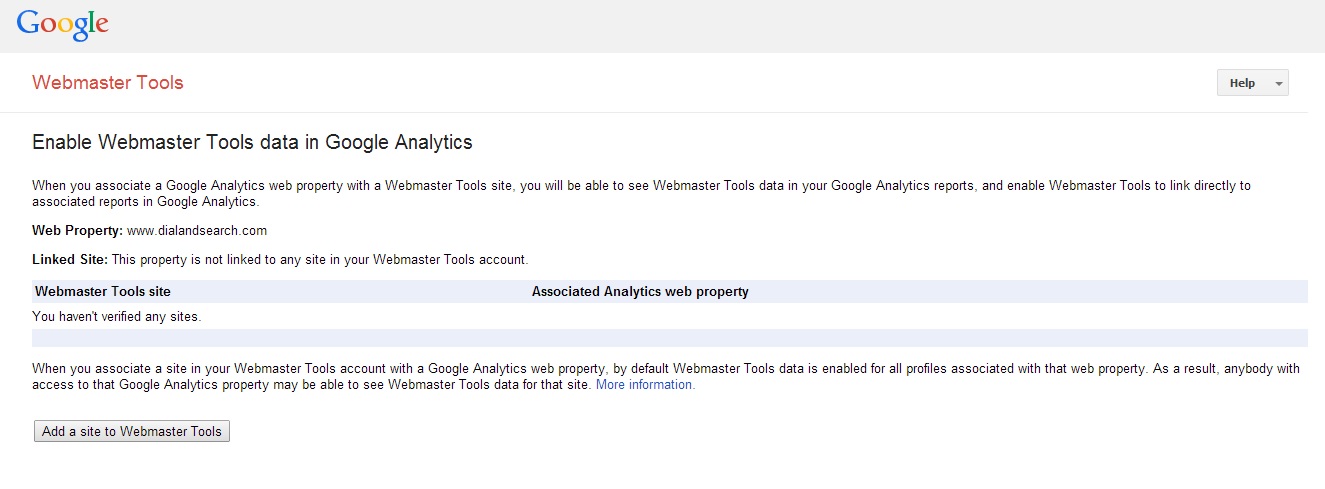
2. Set up Webmasters Tools
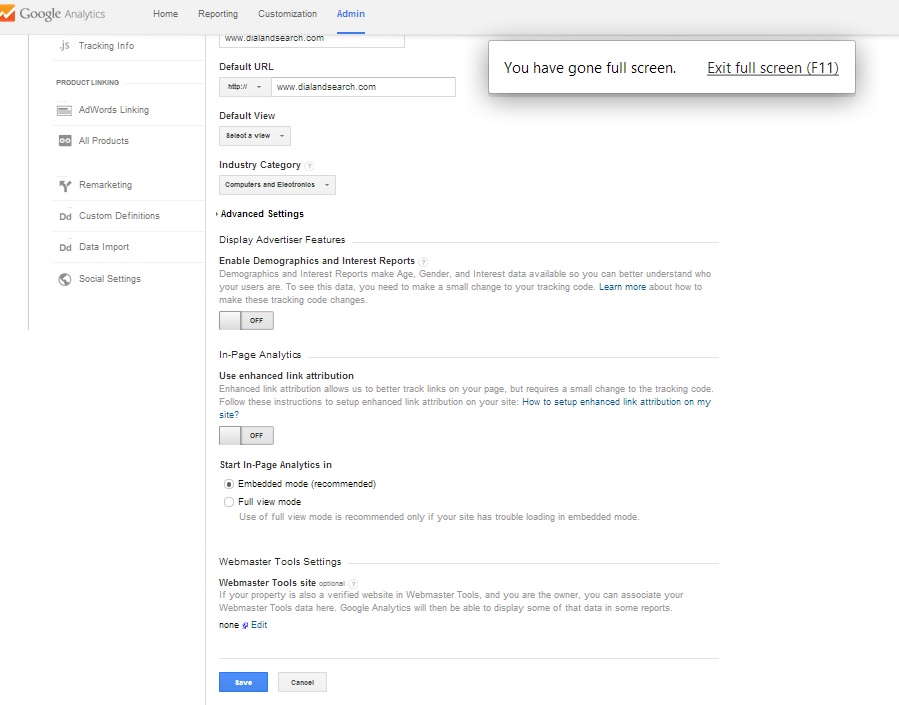
1. Click on "Set up Webmasters Tools data sharing" 2. Scroll down to "Webmasters Tools Settings" --> Click on Edit
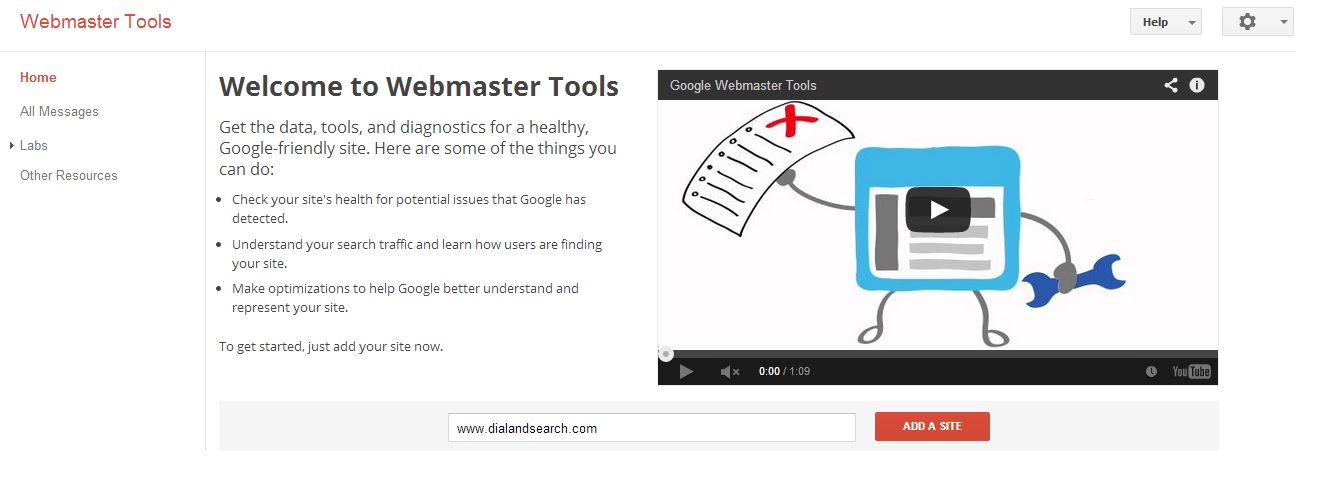
3. Click on Add a Site to Webmaster Tools
4. You will be asked to confirm that you are being redirected to Webmaster site. Click on OK. 5. Key in the website URL and click on "Add a Site"
6. I prefer to use Alternate Methods as the process is quicker
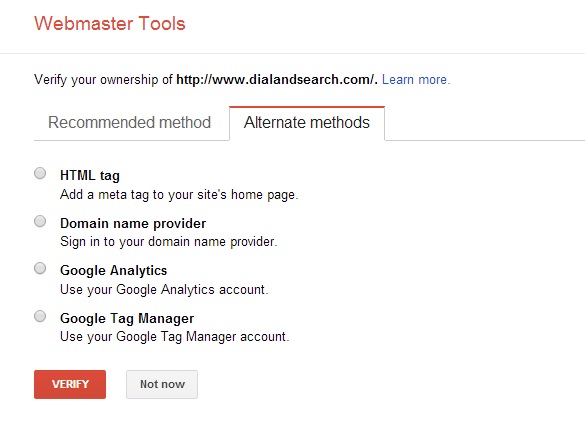
7. Choose the HTML tag option. You will be given a code. Add it to your website's home in the <head> section. Then come back here and click verify.
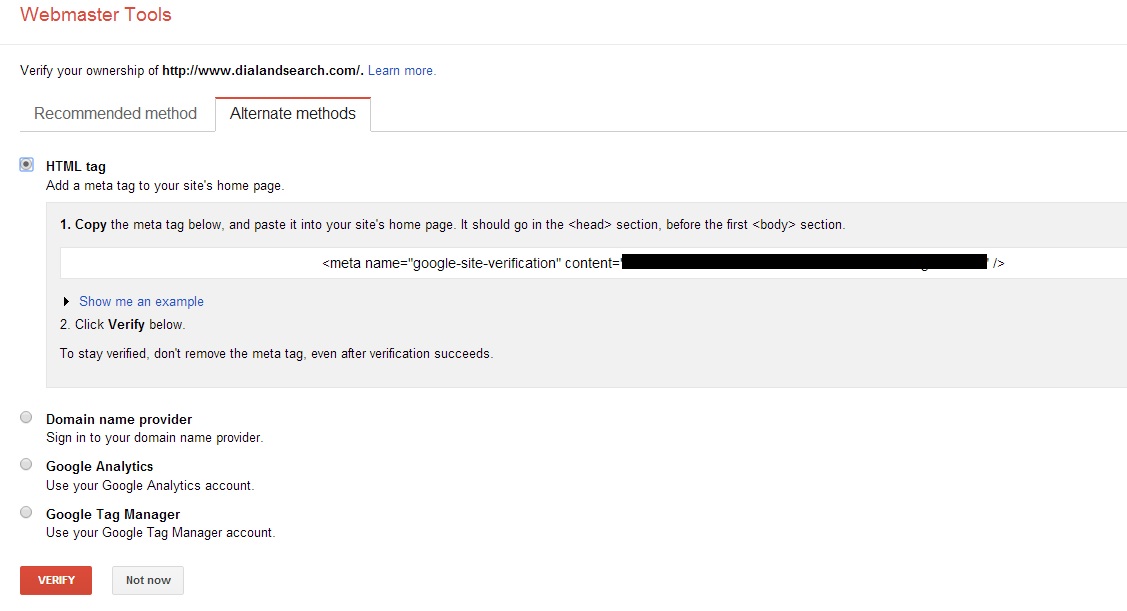
On verification you will get a success message. Once webmasters is set up, you will start seeing data in "Queries" in Google Analytics with a lag period of 2 days. Setting up the tools is first part of the story. The next part deals with how to market your content so that you can track your visitors effectively.
Part 2: Tracking the Campaigns
I see lot of website owners making the mistake of sharing content on various online channels without the right tracking in place. This is unfortunate, because you put lot of effort in digital marketing, yet you do not know which efforts bring more visitors and which end up in generating more leads for your business. If you check your Google Analytics data after few days, you would be seeing something like this in your Traffic data:
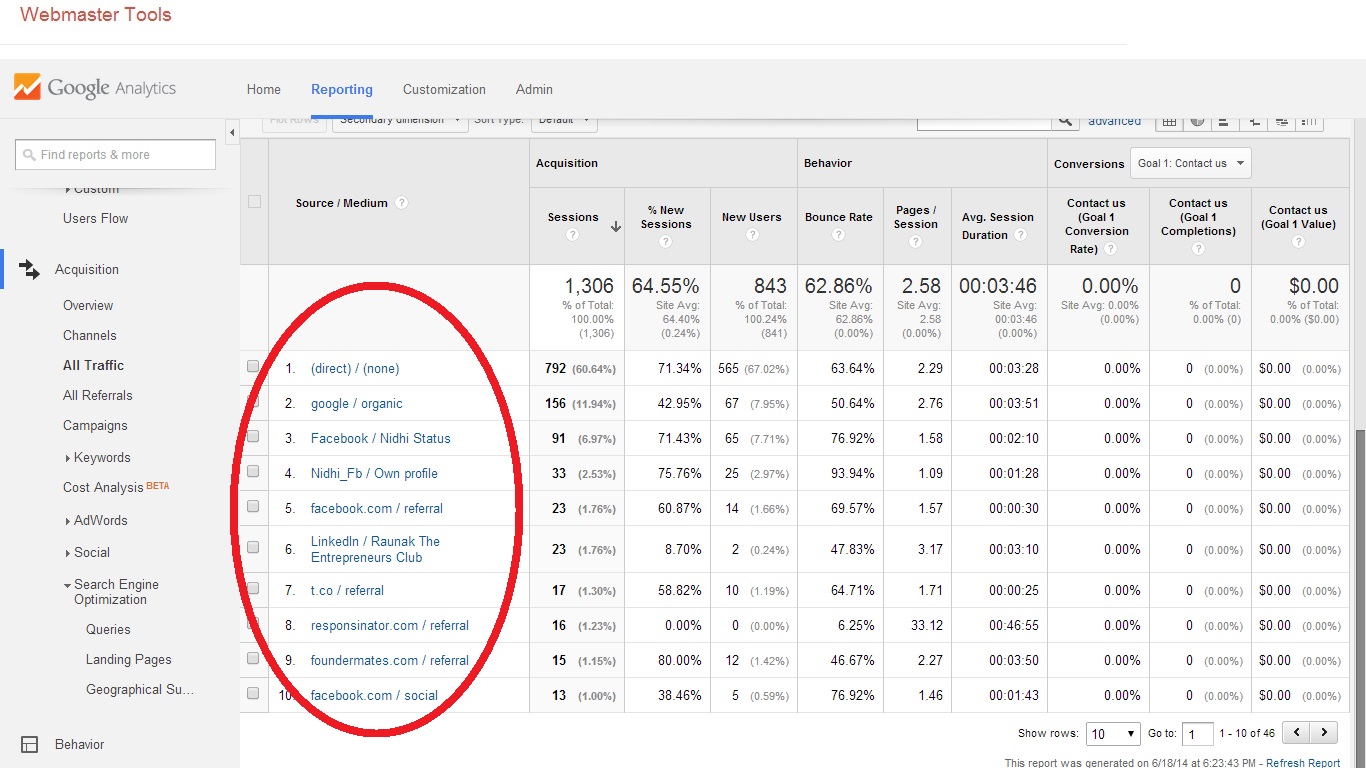
Did you notice the (direct)/none? And the number of visitors associated with that data. We do not have any information on this. However, look at the other sources - Facebook, LinkedIn etc. We have used identifiers such as Nidhi Status, Raunak The Entrepreneurs Club etc. These identifiers help us understand where have we marketed our content which is giving us visitor source. Likewise, wherever we market our website/blog - Be it on social media, emails, Press Releases etc, we should always put a tracking code for each. Here is how to use a tracking code in your URLs for all future communications.
1. Using UTM Builder
Let us, I have created a new content on Local SEO Strategy, on the following URL: http://www.rankhigher.in/knowledge-hub/how-to-do-local-seo-learn-local-seo/ Now, most of us would go and paste this link randomly on every possible medium and share it with people. Instead of doing this, what we should instead do is place a tracking code using a UTM Builder. Visit: https://support.google.com/analytics/answer/1033867
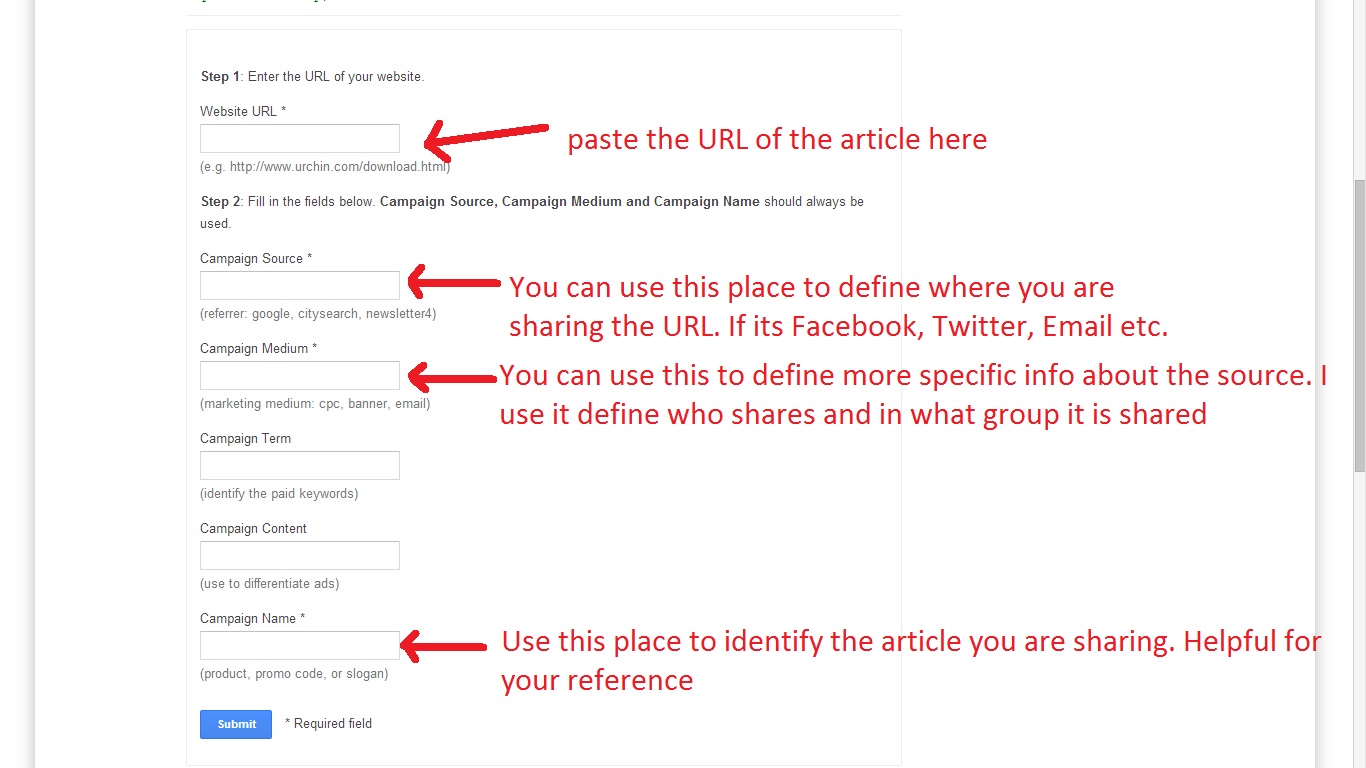
Now let us fill in actual date using the URL I stated above:
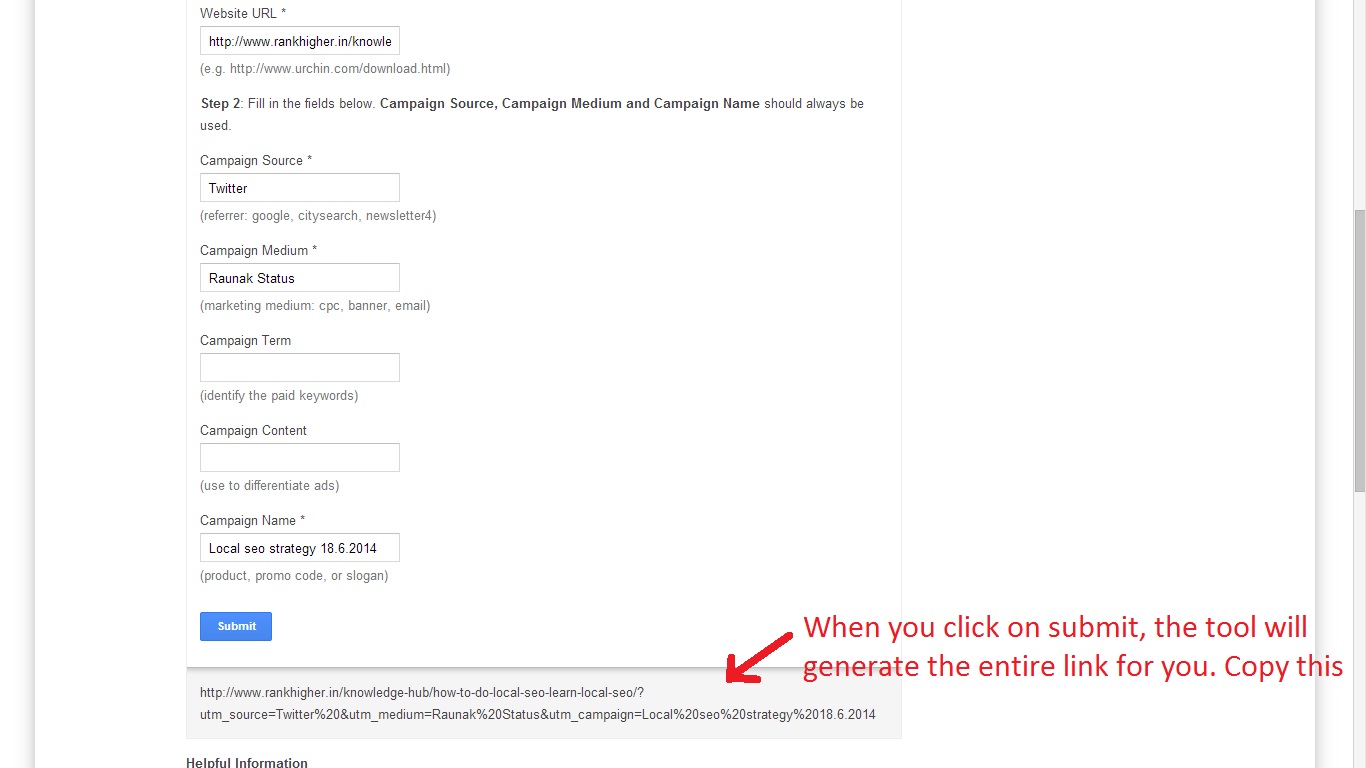
The URL is generated by the tool. This is the URL that needs to be shared in the channel we have identified here, i.e., Twitter. Similarly we can repeat this process to create separate URLs for other campaign sources. So are we ready to promote/share this article on Twitter now? No, not yet. Simply because if you share this huge URL, people will get scared thinking its a spammy link and will never click on it. We will need to shorten the URL.
2. Using a URL shortener tool like bit.ly
The URL which we created using the UTM Builder tool was a cumbersome one: http://www.rankhigher.in/how-to-do-local-seo-learn-local-seo/?utm_source=Twitter%20&utm_medium=Raunak%20Status&utm_campaign=Local%20seo%20strategy%2018.6.2014 We will now use a tool like bit.ly to shorten the URL. bit.ly has booth free and paid versions. Paid version helps you develop custom URLs as well as provide analytics etc. However, we can safely use their FREE version to shorten the URL. We go to bit.ly. There on the text box, we provide the long URL and click on Shorten

We can now use the shortened URL: http://bit.ly/1l2Rlsh and share it on Twitter. So now, when someone clicks on the link you have shared on Twitter, you will get to know which link they clicked on to come to your website. Now imagine, you share lots of articles everyday and use multiple channels to share your content, these 2 tools benefit you a lot to exactly track which marketing efforts are bringing the most results. This covers today's topic of "Are you tracking website visitors?". This article serves as a DO IT YOURSELF instruction to help you install analytics and track visitors. You do not need sophisticated SEO or Social Media Experts to do this for you. Refer this article and use it to optimise your campaigns better. How did you find this article? Did it help you to clarify your doubts? Will this help you to track your visitors better? Let me know in the comments section below.